
May The Forks Be With You. Always
Getting Started with Git and GitHub: A Beginner's Guide to Version Control and Collaboration


Git and GitHub are two essential tools in the world of software development. In this article, we’ll take a closer look at Git and GitHub, and discuss how they are used in software development.
What is Git?
Git, which stands for Global Information Tracker, is a free and open-source distributed version control that allows multiple developers to work on the same codebase and keep track of changes to code over time.
It tracks changes to code in small, incremental snapshots called commits, which can be viewed, modified, and reverted as needed. Developers can collaborate more effectively, easily track code changes, and revert to previous versions if necessary.
What is GitHub?
GitHub is a web-based hosting service for Git repositories. It provides a range of features to make collaboration easier, including tools for bug tracking, project management, and code review. Additionally, it allows developers to fork repositories, which creates a copy of the codebase that can be modified independently of the original.
What is the difference between Git and GitHub?
Git is a command-line tool that allows developers to manage code locally on their computers, while GitHub provides a web interface for managing Git repositories online. GitHub also adds additional collaboration features on top of Git, such as pull requests, issues, and code review tools.
What is a repository?
A repository is a central location where all the files, resources, and code for a particular project are stored and managed. It’s like a folder that contains all the files and folders associated with a project. Each repository has a unique URL that can be used to access the code online.
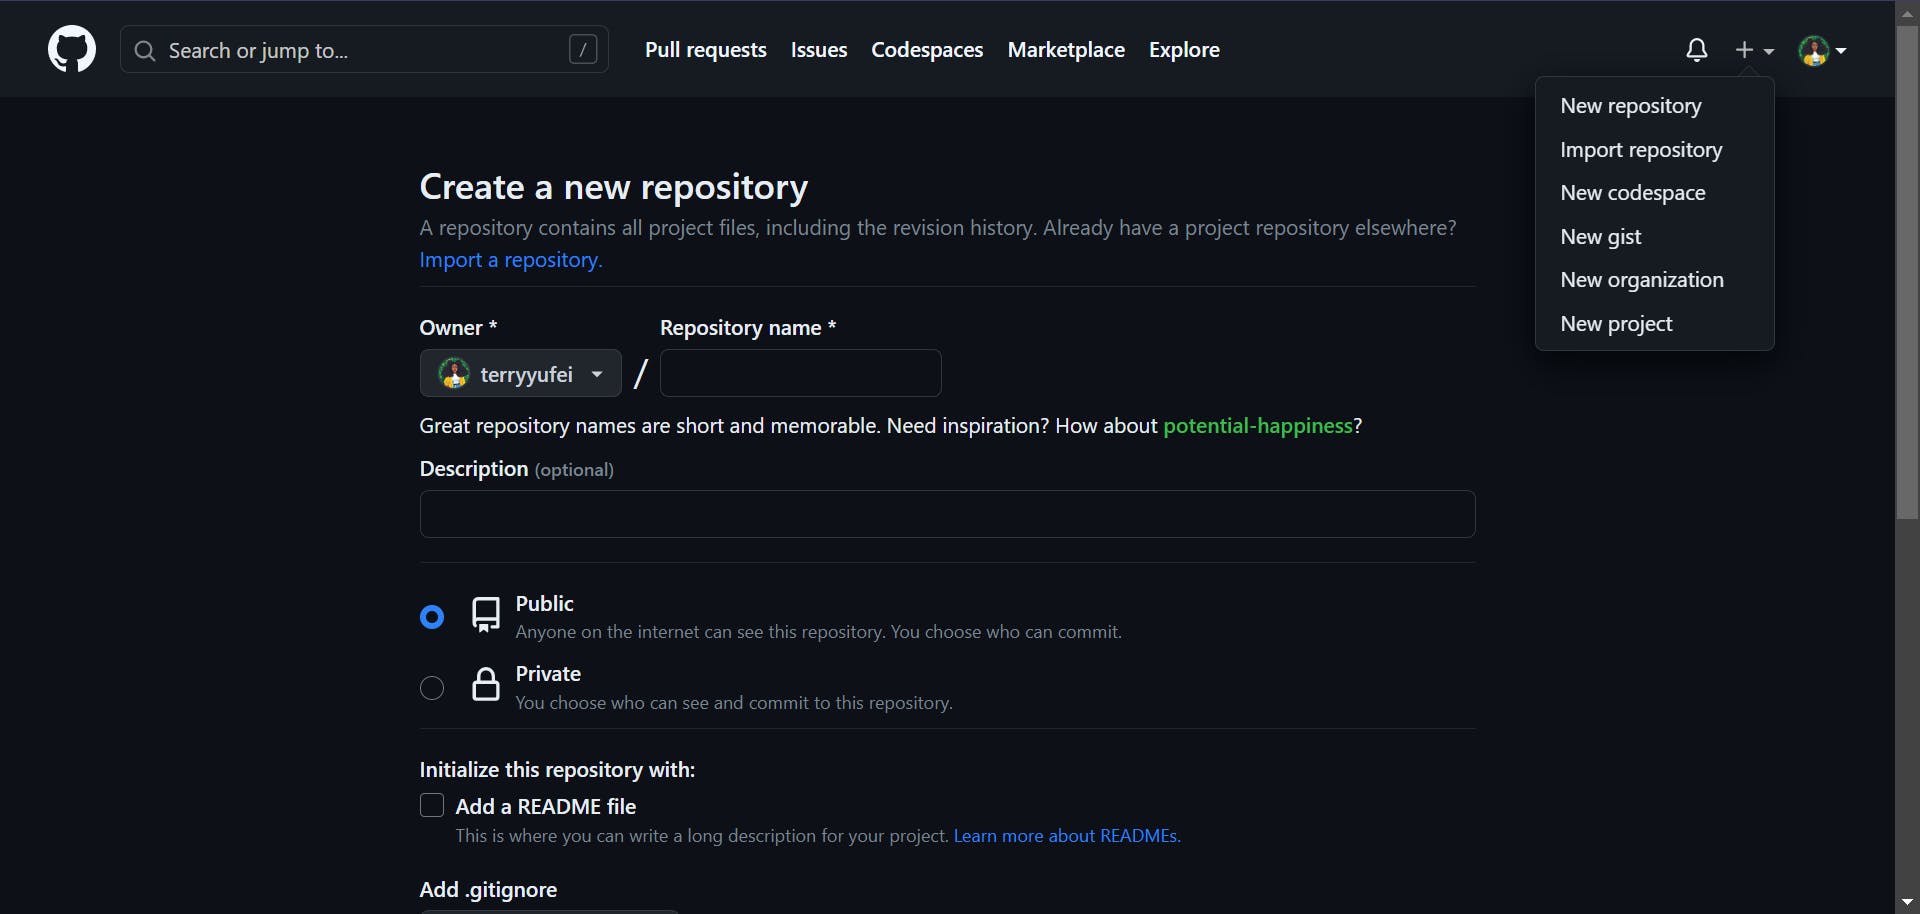
To create a new repository on GitHub, follow these steps:
Log in to your GitHub account and navigate to the main page.
Click on the "+" icon in the top right corner of the page.
Select "New repository" from the drop-down menu.
Enter a name for your repository in the "Repository name" field. Make sure the name is descriptive and easy to remember.
(Optional) Enter a brief description of your repository in the "Description" field.
Select the repository's visibility. You can make it public or private, depending on whether you want others to be able to see and contribute to your code.
Choose whether to initialize the repository with a README file. This is a good option if you want to give others an overview of what your repository contains.
Click the "Create repository" button.
Congratulations, you've just created a new repository on GitHub! You can now add files to the repository, make changes to the code, and collaborate with others using Git and GitHub.
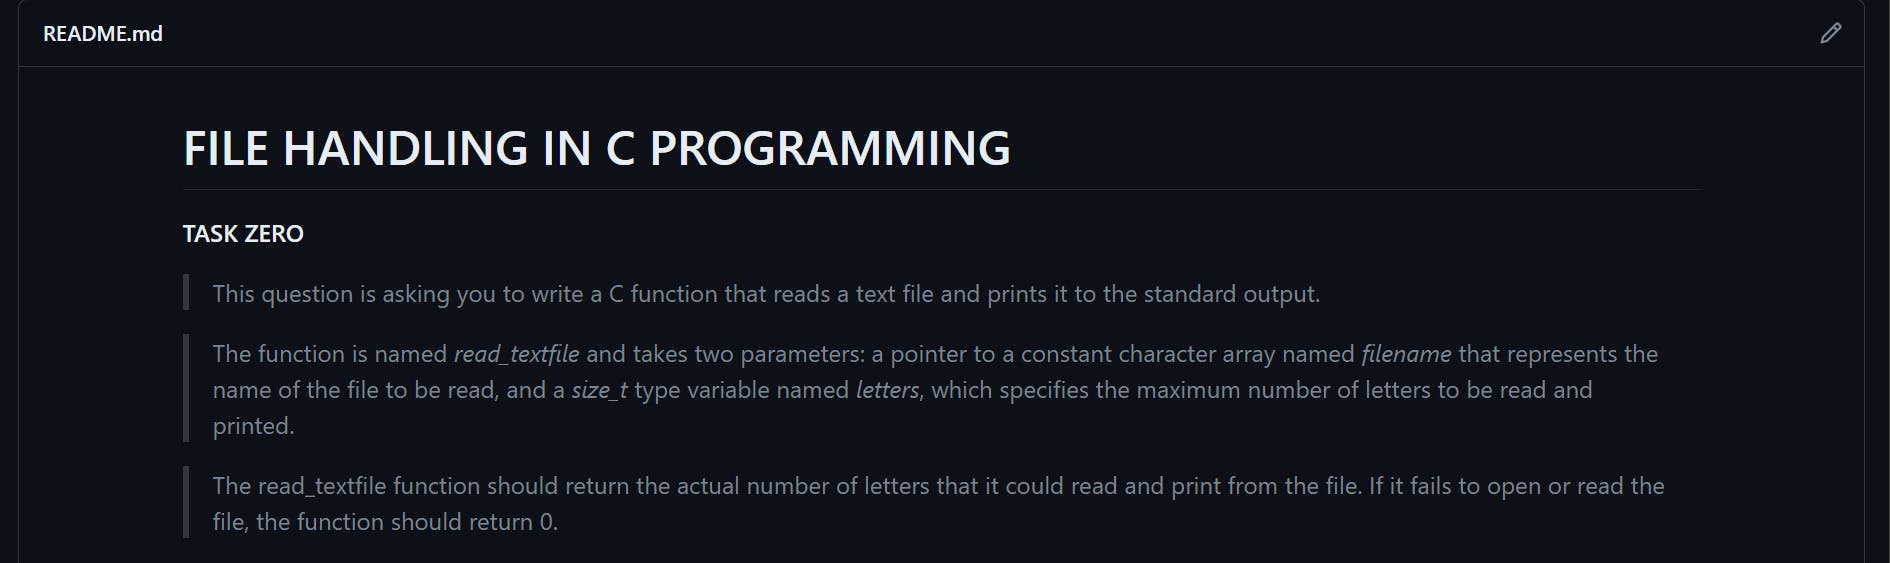
What is a README?
A README is a file that contains information about a project. It is usually the first file people will see when they visit your repository, so it is important to make it informative and engaging. A good README can make a big difference in how others perceive your project. By taking the time to write a clear, concise, and informative README, you can make it easier for others to understand and use your code.
Tips on how to write a good README
Keep it concise: Your README should be short and to the point. Don't include unnecessary information or go into too much detail.
Use clear, simple language: Avoid technical jargon or overly complex explanations. Use language that anyone can understand, regardless of their technical background.
Include screenshots or diagrams: Visual aids can be very helpful in explaining what your project does and how to use it. Use screenshots, diagrams, or other graphics to illustrate your points.
Provide clear instructions: If your project requires installation or configuration, provide clear, step-by-step instructions on how to do so. Make it as easy as possible for others to use your code.
Acknowledge contributions: If others have contributed to your project, acknowledge them in your README. This can help build goodwill and encourage others to contribute in the future.
You can also make your README more readable and visually appealing by formatting it using markdown. Markdown is a lightweight markup language that's often used to format text in README files and other types of documentation. It's a simple and easy-to-learn language that allows you to add formatting such as headers, bold and italic text, links, lists, and more to your README.
Here are some common Markdown formatting options you can use in your README:
Headers: Use "#" symbols to create headers of various sizes (e.g. "# Heading 1", "## Heading 2", etc.)
Bold and italic text: Use "**" to bold text and "_" to italicize text (e.g. "Bold text", "Italic text")
Lists: Use "-" or "*" to create bullet points, or "1.", "2.", "3." to create numbered lists.
Links: Use square brackets followed by the URL in parentheses to create links (e.g. "Link text")
Code blocks: Use backticks to create code blocks or highlight code snippets (e.g. "python print('Hello, world!’) ‘”)
How to add and commit changes
When you make changes to your code in a Git repository, you'll need to commit those changes to save them to the repository's history. Here's how to do it:
Use the "git status" command to see which files have changed.
Use the "git add" command to stage the changes you want to commit. You can add individual files or directories, or use the "git add ." command to add all changes.
Use the "git commit -m 'your commit message' " command to commit the changes to the repository.
  git status #to checks untracked files
  git add <filename> #to add individual file
  git add . #to add everything
  git commit -m 'your commit message' #commits changes to the repo
  git push #pushes local changes to remote repository
Writing helpful commit messages is an important part of Git workflow. Here are some tips for writing good commit messages:
Be clear and concise: Keep your commit messages short and to the point. A good rule of thumb is to keep the summary line under 50 characters.
Use the imperative mood: Start your summary with a verb in the present tense, such as "Fix", "Add", or "Update". This makes your commit messages more actionable and easier to understand.
Provide context: If your commit addresses a specific issue or task, include a reference to it in the commit message. For example, "Fix typo in README (#123)".
Separate summary and description: Use a blank line between the summary and the more detailed description of the changes.
Use consistent formatting: Use the same formatting style for all your commit messages to make them easier to read and understand.
By following these guidelines, you can write commit messages that are helpful and informative to others who may be working on the same project.
How to git push
When you're working on a local Git repository, you can make changes to your code and commit them to the repository's history. However, these changes only exist on your local machine and aren't visible to others who may be working on the same project. To share your changes with others and collaborate on the same codebase, you'll need to push your code to a remote repository, such as GitHub.
Here are the steps to push your code changes to a remote Git repository:
First, ensure you're in the local repository directory in your terminal or command prompt.
Use the "git remote -v" command to check the name and URL of the remote repository that your local repository is linked to. If you haven't linked your local repository to a remote repository yet, you'll need to do that first using the "git remote add" command.
Use the "git push" command to push your local changes to the remote repository. By default, "git push" will push changes to the "origin" remote repository and the current branch.
If it's your first time pushing to the remote repository, Git may ask you to authenticate yourself with a username and password. Enter your GitHub username and password to authenticate.
After pushing your changes, you can go to the remote repository on GitHub and verify that your changes have been successfully pushed.
It's important to note that if multiple people are working on the same remote repository, it's a good practice to pull changes from the remote repository before pushing your changes. This helps prevent conflicts and ensures that your local copy of the code is up-to-date with the latest changes.
Conclusion
In conclusion, Git and GitHub are powerful tools that revolutionize version control and collaboration in software development. Git provides a distributed version control system that allows developers to track changes to code over time, revert to previous versions, and work simultaneously on the same codebase. GitHub, on the other hand, serves as a web-based hosting service for Git repositories, offering additional collaboration features such as bug tracking, project management, and code review tools.
Creating a repository on GitHub is a straightforward process, allowing developers to easily organize and share their code with others. A README file plays a crucial role in providing an overview of the project, guiding users on how to use the code, and showcasing its features. By following best practices for writing a good README, developers can enhance the visibility and accessibility of their projects.
These messages serve as documentation for the changes made and help collaborators understand the purpose and context of each commit. Pushing changes to a remote repository, such as GitHub, ensures that others can access and collaborate on the codebase.
Ultimately, Git and GitHub empower developers to work more efficiently, collaborate seamlessly, and maintain a detailed history of their code. By leveraging these tools effectively, software development teams can streamline their workflows, enhance code quality, and foster greater collaboration among team members.
I hope you found this article informative and helpful. Follow these links https://twitter.com/Mssophia_/status/1642586443867365381?s=20 || https://education.github.com/git-cheat-sheet-education.pdf for some helpful tips on git processes.
Happy coding!